There are plenty of tutorial for configure PHP in Ubuntu. However, it seems there is lacking of a complete guide for PHP Development in Ubuntu, especially for Debugging.
A debugger is definitely the best friend of a developer.
This post will contains the following three parts.
1. Enabling the userdir module in Ubuntu
2. Configure PHPStorm to upload to a local directory
3. Enabling XDebug in Apache2
1. Enabling the userdir module in Ubuntu
a. Enable the userdir module
root@jimmy-ubuntu:/etc/apache2/mods-available# a2enmod userdir
b. Enable PHP in the userdir by modifying /etc/apache2/mods-available/php5.ini. By default, userdir is just for placing static files. This is blocked explicitly in php5.ini. So, we have to comment it out.
#<IfModule mod_userdir.c>
#    <Directory /home/*/public_html>
#        php_admin_flag engine Off
#    </Directory>
#</IfModule>
c. Test with phpinfo.php in /home/jimmy/public_html
phpinfo();
d. Use browser to browse http://localhost/~jimmy/phpinfo.php
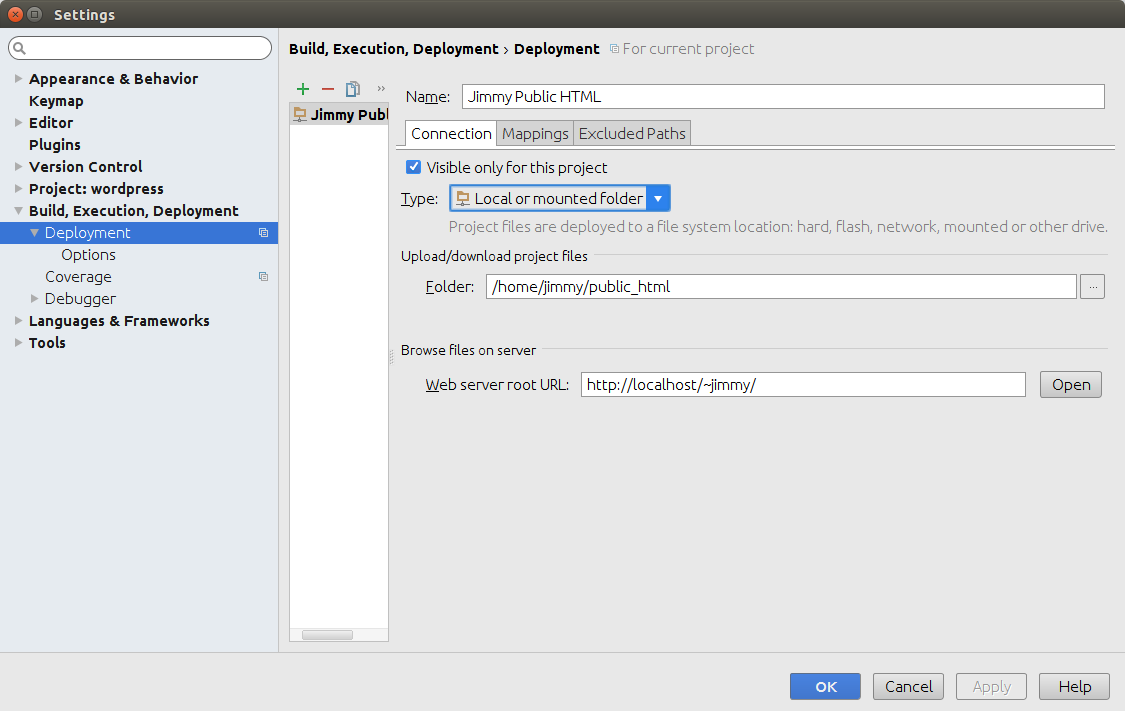
2. Configure PHPStorm to upload to a local directory
3. Enabling XDebug in Apache2
a. First, we need to install and enable XDebug in Ubuntu
sudo apt-get install php5-xdebug
sudo php5enmod xdebug
b. Modify /etc/php5/apache2/conf.d/20-xdebug.ini to include the following.
zend_extension=xdebug.so
xdebug.remote_enable=1
xdebug.remote_handler="dbgp"
xdebug.remote_host="localhost"
xdebug.remote_mode="req"
xdebug.remote_port=9000
xdebug.idekey="PHPSTORM"
c. Restart Apache2
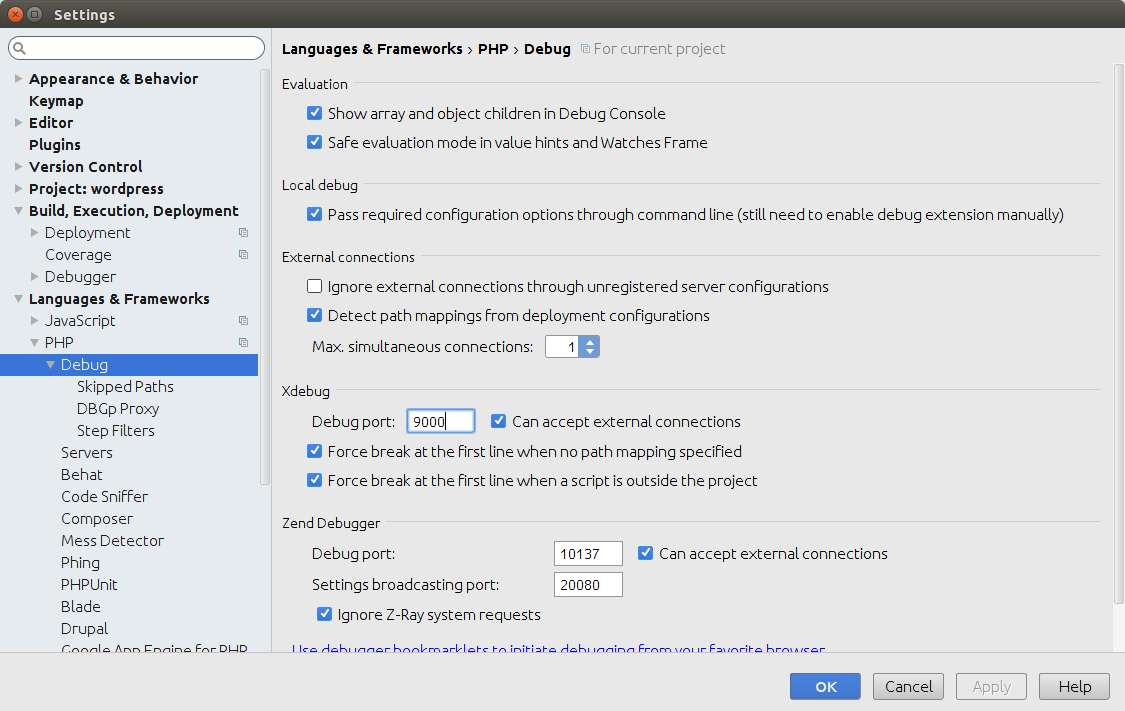
d. In PHPStorm, we need to enable the listening port. By default, it is listening to port 9000.
e. Next, we need to set the Cookie in the page, XDebug is enabled by the existence of cookie. Use browser developer console to run the following line.
javascript:(function() {document.cookie='XDEBUG_SESSION='+'PHPSTORM'+';path=/;';})()
f. Add a break point in your PHP Code, run the browser. It should break at your break point.
