I have tested DB Link functionality setup locally with 2 Oracle on 2 local VM Servers.
DB Link is a functionality that one Oracle server can access tables / resource on another server as a local tables, which is particular useful when you want to keep multiple updates in a transaction.
DB Link is for.
1. Move small amount of data
2. Enjoy transaction garantee (with commit / rollback)
DB Link is NOT for.
1. Migrate huge amount of data
2. Database synchronisation (Use Golden Gate instead)
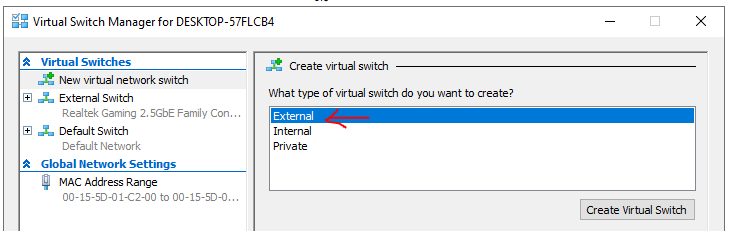
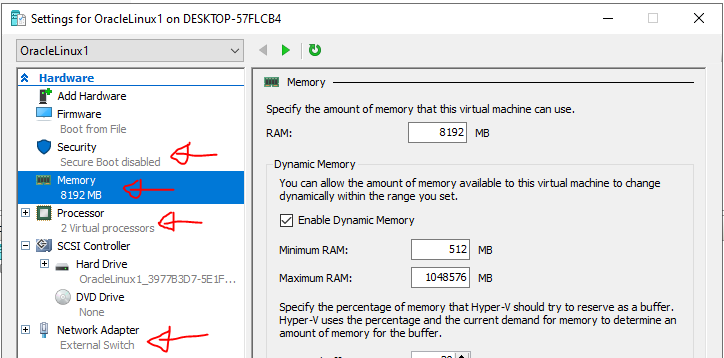
I have setup the topology as followed, both Oracle 1 and Oracle 2 are PDB in my home lab.
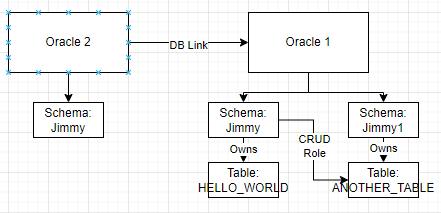
Oracle 2 is connected to Oracle 1 via a DB Link.
User can connect to Oracle 2 and operate on Oracle 1 as “Jimmy” on Oracle 1, including the DB Objects owned by “Jimmy” or owned by another owner (“Jimmy1”) via user role.
Operation involving Oracle 1 DB objects on Oracle 2 are within transaction boundary. It has transaction garantee but slow down DB operations as a drawback.
Next, we will look at the setup of the Topology.
On Oracle 1.
1. Setup 2 normal DB users (Jimmy and Jimmy1), which has RESOURCE, CTXAPP, CONNECT privilege.
2. Create HELLO_WORLD table under Jimmy schema, Create ANOTHER_TABLE table under Jimmy1 schema
3. Create a new role TEST_ROLE by SYS, which has a CREATE ROLE privilege .
4. As Jimmy1, grant “grant select, insert, update, delete on ANOTHER_TABLE to TEST_ROLE”
5. Assign Jimmy (NOT Jimmy1) to TEST_ROLE role.
6. Login as Jimmy, verify it can access Jimmy1.ANOTHER_TABLE.
On Oracle 2.
1. Setup 1 DB User (Jimmy), grant RESOURCE, CTXAPP, CONNECT privilege. Also, grant “CREATE DATABASE LINK” privilege too.
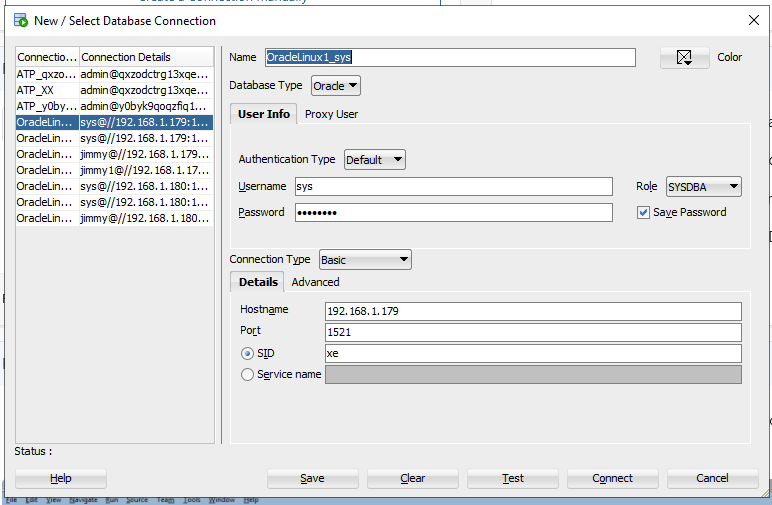
2. Create the database link (oracle1) with the following command on the DB User, 192.168.1.179 is IP Address of Oracle 1
CREATE DATABASE LINK oracle1

CONNECT TO jimmy IDENTIFIED BY password_of_jimmy_on_oracle1

USING '(DESCRIPTION =

    (ADDRESS_LIST =

        (ADDRESS = (PROTOCOL = TCP)(HOST = 192.168.1.179)(PORT = 1521))

    )

    (CONNECT_DATA =

        (SERVICE_NAME = XEPDB1)

    )

)';
3. Verify Jimmy on Oracle 2 can access HELLO_WORLD table and ANOTHER_TABLE with the following commands
SELECT * FROM HELLO_WORLD@ORACLE1;

SELECT * FROM JIMMY1.ANOTHER_TABLE@ORACLE1;

INSERT INTO JIMMY1.ANOTHER_TABLE@ORACLE1 VALUES ('999')
The primary challenge on setting up the database link is the authentication between Oracle 1 and Oracle 2. Basically Oracle 2 acts like a client of Oracle 1, however, the exact mechanism depends on the database setup. It can be as simple as username and password, it can be Kerberos with forwarding credential, it can also be Oracle Wallet on Autonomus Transaction Database.